This blog post is part of our Post-Processing series. For more information on post-processing, check out our articles on removing supports and coloring and coating.
Post-processing 3D printed parts often involves multiple finishing methods to make the part look and feel how you want. In this article, we’ll cover the finishing options for assembling and smoothing your parts. It is important to note, however, that not all of the methods listed will work with all projects, so it is crucial to know how your chosen printing process works and how your material and geometry will behave under friction and exposure to solvents.
Assembling
When a design is too large for a 3D printer’s build chamber, it is split into sections. Each of these sections is printed separately and later adhered together in post-processing. There are two primary methods for joining 3D prints:
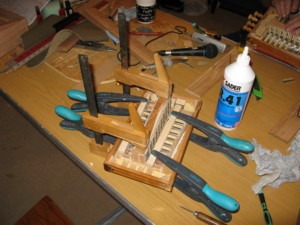 Gluing
An industrial bonding agent is spread over the surfaces of the sections that are to be joined. Clamps are then typically used to hold the sections in place while the glue dries. This method is usually simple and inexpensive since the materials and labor needed are minimal. While the bond created between the sections by gluing is strong, glued parts can never reach the same strength as a solid part that was printed in one piece due to the glued area being a point of weakness if placed under too much stress.
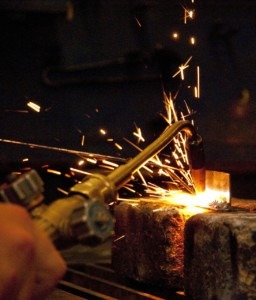 Welding
Welding is used to create a stronger bond than gluing, but it can only be used for a few materials. ABS, which is a thermoplastic used in FDM 3D printing, can be welded using acetone. The acetone slightly melts the surface of the ABS so that when the sections are pressed together and the acetone evaporates, the sections are chemically bonded to each other. This method will not work for other plastics, which is why gluing is favored for other materials. Additionally, since DMLS parts are made of metal, they can be traditionally welded together. However, intricate pieces may not be able to be welded if the process would damage their details and/or tolerances.
Smoothing
Because 3D printing makes parts layer-by-layer, a part’s surface will often not be smooth. Visible layer lines, unintended textures, and burrs from where support structures were attached can affect the overall aesthetic of the part. To remedy this, there are multiple smoothing techniques available to produce a clean finish:
 Sanding
One of the most common ways to smooth a print is by manually sanding the part with varying grits of sandpaper. This can be done with either wet or dry sandpaper, though wet sandpaper helps reduce heat from friction and the amount of airborne particles produced by the process. This method is easy to use on most materials, but it can be tedious depending on the amount of sanding needed. Since it is a manual process, it is easy to end up with uneven areas, and if too much sanding is done, it can also alter the part’s accuracy.
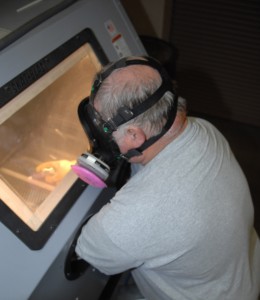
Abrasive Blasting
Abrasive blasting, typically called sandblasting, involves using compressed air to propel an abrasive material, such as sand or glass beads, at the surface of a printed part. This is done within a chamber where the abrasive material can be contained while an operator aims the jet of material at the part. This method often produces a more even finish than traditional sanding. Due to the high pressure of the spray, abrasive blasting is not recommended for intricate or delicate parts. For DMLS parts, bead blasting is specifically used to deburr the metal surface.
Tumbling
A popular automated smoothing method is tumbling. Parts are placed inside a secure box filled with small ceramic chips. Once closed, this box will shake the contents, which effectively makes the chips vibrate or rub against the surface of the part and wear down layer lines and sharp edges over a given period of time. This method is useful for smoothing multiple parts at once, but can be damaging to the accuracy of the part’s dimensions, particularly with sharp edges and details.
Vapor Smoothing
Just as acetone can be used to weld ABS parts together, it can also be used to smooth them. To do this, the ABS part is placed inside a closed chamber where it is exposed to acetone vapor. The outer surface of the part will slightly melt, which makes layer lines and other imperfections smooth in the process. This method can be hard to control because the process is relatively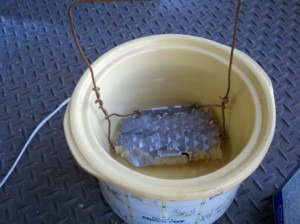 quick. It can also be dangerous if the work area is not properly ventilated and observed because acetone fumes are both toxic and flammable. Other solvents may be used for other types of plastics, but this is typically only performed with acetone for ABS parts.
Dipping
For faster results than vapor smoothing, a part can be directly dipped into a solvent for the same effect. Again, this is typically done with acetone for ABS parts as other plastics and solvents cannot easily achieve the same level of results. With dipping, a wire is connected to the ABS part, and the part is lowered into a vat of acetone so it is completely submerged. This is only done for a few seconds at a time until the desired surface finish is achieved. While this method does lower safety concerns because much less vapor is present, dipping might be too much for some prints. If a part is delicate or is submerged for too long, it may suffer significant deformation.
 Polishing
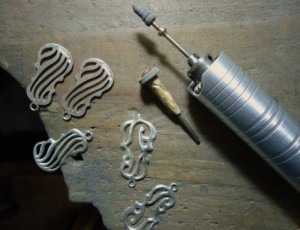
After sanding, a printed part can be polished to create a mirror-like surface finish on many materials. This is done with a polishing compound and either a buffing wheel or a hand cloth. Depending on the quality of sanding and polishing, the final finish can even imitate that of traditionally injected molded parts. A significant drawback to polishing is that primer and paint may not stick to a polished surface.
Gap Filling
Sometimes, the printing process or sanding can leave gaps in the printed part. These gaps can be repaired by filling them in with various materials, such as epoxy resin, auto body filler, a mixture of ABS and acetone for ABS parts, and more. After filling the gaps, more sanding is required.
3D Printing at 3 Space
Here at 3 Space, we offer a variety of 3D printing services. Our engineers are experts in the field and have conquered many challenging projects, so you can be sure your project is in the best hands before, during, and after printing. For more information or to request a quote, contact us today.
