This blog post is part of our Post-Processing series. For more information on post-processing, check out our articles on removing supports and assembling and smoothing.
Most 3D printed parts go through various stages of post-processing to attain the look and feel you desire. In this article, we’ll discuss the finishing options for coloring and coating your parts. Keep in mind, however, that not all of the methods listed below will work for all projects. It is important to know how your chosen printing process makes parts and how your material will behave when it comes into contact with different chemicals.
Coloring
While the range of materials currently available for 3D printing offers a wide selection of mechanical properties, colors are more limited. 3D printing metals keep their original metallic color, and most plastics and resins are produced in a small array of primary colors. For custom shades or multi-color parts, it is often necessary to color the piece in post-processing:
 Dyeing
A common way to quickly change the color of a part is by dyeing it in a hot color bath. The part is submerged in the dye where it absorbs the color without altering the part dimensions. This method is most effective on clear or translucent parts such as those made with PolyJet, MultiJet, and SLA. The porous parts made by SLS are also excellent candidates for dyes. Hot color baths are perfect for dyeing parts with intricate geometry or fine details. It is important to note that dye usually only penetrates a part’s surface about 0.02 inches, so wear on the part may make the original color visible. Another method of dyeing available is a dye that can be wiped over the part like wood stain. However, this method takes longer than a hot color bath, and fine details could be damaged in the process.
 Priming & Painting
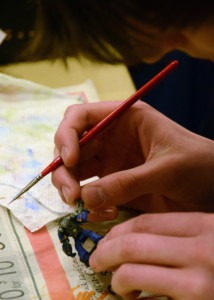
If you’re looking for more controlled coloring, such as would be needed for a multi-colored part, then priming and painting is a good option for coloring your part. Once the part has been sanded to remove surface imperfections, it is primed with a few thin coats of priming paint/spray. Then, multiple coats of paint are applied until the part looks how you desire. For best results, a topcoat is then applied to protect the paint. This method is often used for FDM parts because any FDM material can be primed and painted. While allowing greater control over color, this process can be quite time-consuming depending on the amount of sanding, priming, and painting needed. Materials and labor may also be expensive depending on the part’s needs and level of detail. Keep in mind that the layers of primer and paint will add bulk to your part, so dimensional accuracy can be affected.
 Hydro Dipping
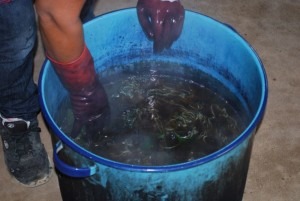
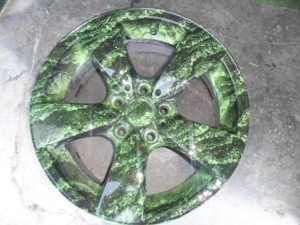
Hydro dipping, or water transfer printing, is a relatively new coloring method that allows you to easily apply colors or patterns to the surface of a 3D printed part. For this method, the desired color or pattern is laid on the surface of water and an activator is applied to it so the pattern will stick to the part’s surface. The part is then dipped into the water where the water’s surface tension makes the pattern curve smoothly around the part. Upon removal, the part is set aside to dry. This is a great option for adding a specific design to your part. However, while the process seems straightforward, it requires special equipment and a certain level of skill to ensure it is done correctly.
 Photobleaching
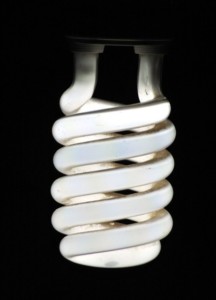
Some transparent 3D printing resins, like VeroClear, have a slightly yellow tint once they are done printing. With the photobleaching process, the majority of this yellow tint can be removed with exposure to fluorescent lighting so the part will be clear as intended. To photobleach a part, it is placed either in an illumination chamber or under table lamps where fluorescent light is shone upon it for an extended period of time. This process can take 6-24 hours, and the part’s geometry may influence the quality of the final results. An illumination chamber ensures more reliable results because it enables the operator to control the temperature and light intensity on the part.
Coating
Depending on your part’s intended purpose, it may need to be coated to improve its durability. This is often the case for parts that will be exposed to moisture, UV light, and more. Here are a few basic ways to coat a 3D printed part:
Epoxy Coating
Epoxy resin can provide your part with a smooth, clear shell once it has been properly mixed and applied. This is done by mixing the resin with a hardener that will cure it quickly. This mixture is then spread over the surface of the part and allowed to cure. The results make it so  the part is highly resistant to chemical and environmental degradation, such as corrosion/rust and water, as well as general peeling, cracking, and normal wear. However, epoxy does not make parts UV resistant. Silicones and vinyl-acrylates may also be used for moisture resistant coatings.
UV Resistant Coating
Some paints for 3D printed parts will already make the part UV resistant. In general, however, a clear acrylic spray/varnish can be used to help make the part more resistant to UV rays. This is especially helpful with parts made from PolyJet, MultiJet, and SLA, which are all 3D printing methods that utilize UV reactive resins to create a part. With resin parts, further exposure to UV light may make them brittle and turn them yellow.
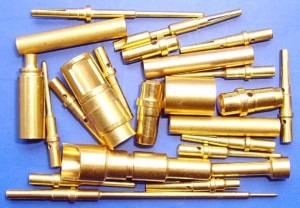
Electroplating
Another method of coating a 3D printed part is electroplating. Put simply, this is a process that uses an electric current run through a solution of metal ions to coat the submerged part in a thin layer of metal. Doing so increases the strength and durability of the part while also making it look metallic. Some common metals for electroplating are copper, chrome, nickel, silver, and gold. While electroplated parts have excellent aesthetic appeal, this process is not often used because only a handful of 3D printing materials can be electroplated. Additionally, this process is expensive and complex and requires a skilled worker to complete it properly.
3D Printing at 3 Space
Here at 3 Space, we are experts with multiple 3D printing technologies. Our engineers have successfully handled many complex challenges over the years, and we look forward to working on yours next! For more information or to request a quote, contact us today.